A Very Basic Tutorial – Part III

With this post I will conclude the tutorial sessions on creating and managing menu items. Click Part I and/or Part II, if you did not yet read them. I will use the ‘Klopp Story’ tab above as an example of the hierarchical nature of a more complex menu structure.
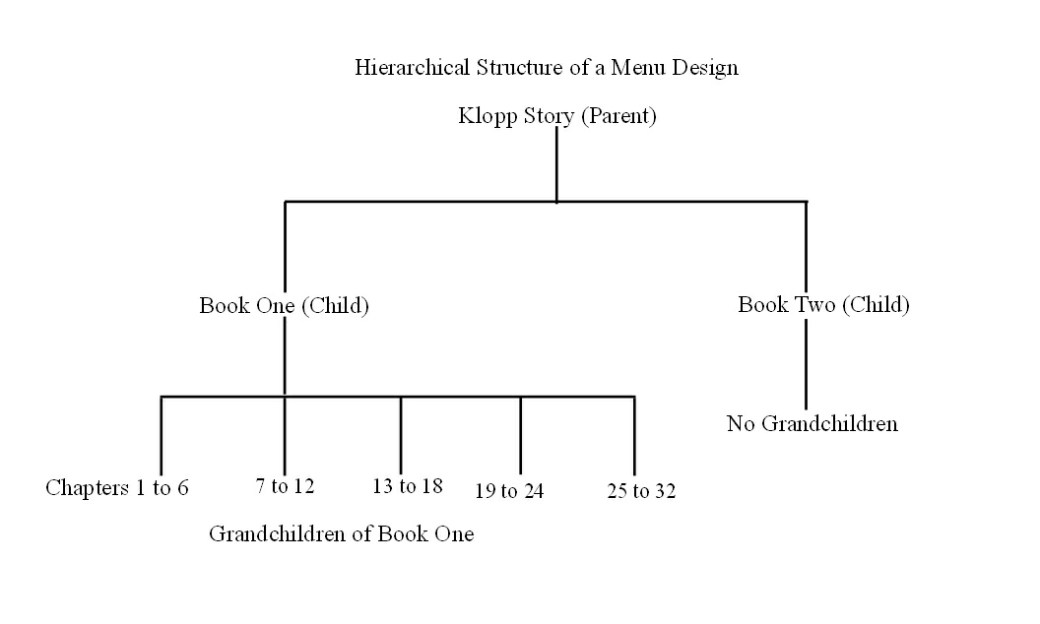
As you can see from the tree diagram above, the ‘Klopp Story’ page (Parent) has two children (sub items) ‘Book One’ and ‘Book Two’. The latter is still empty waiting for the Grandchildren to be written. Book One has five sub items, which are the grandchildren of the ‘Klopp Story’. As the diagram indicates, I had to create seven pages all together. To avoid confusion, it is important to note that each page you create must have its own unique name.
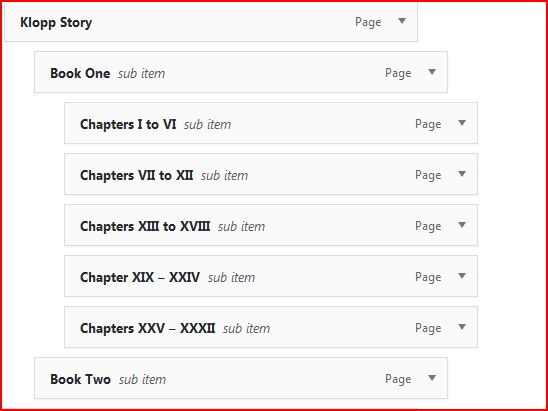
In the ‘Menus’ section that you control as the administrator you find that your sub items may scattered all over the place in a fairly unorganized fashion. Click and drag the sub item ‘Book One’ under the ‘Klopp Story’ and move it a bit to the right to make it a Child (sub item). Then click and drag the Chapter sub items and move them a little more than before to the right as shown on the diagram above. Treat the ‘Book Two’ sub item the same way as the ‘Book One’ item. Make sure to save the changed main menu, when you are done. Please note you can experiment without fear of messing up your blog site, since you can always the Menus section later and delete all the undesirable pages. Happy Blogging!
